Friday, December 30, 2011

NYE cocktails

I'm thinking ahead to New Year's Eve, cocktails, and the possibility of staying up until midnight.  Which I doubt will happen, especially if I indulge in these cocktails, but I'm totally fine with that.

Martha has some amazing winter cocktails and champagne and sparkling wine cocktails.  These in particular have caught my eye (and my mouth):

Pomegranate-Champagne Punch


Prosecco Sangria

Don't those look amazing?! I don't want to pick just one, so I might make all of them, get crazy drunk and fall asleep by 9:30.  Which would mostly be a repeat of last year's New Year's Eve for me.

Have a wonderful New Year's Eve celebration!  If I can recover from all these cocktails, I'll be back bright and early on Monday morning with my New Year's ResolutionsHappy New Year!

Wednesday, December 28, 2011

Christmas card books

I love Christmas cards, both sending and receiving.  They are on display the moment they arrive at my house, and they are usually the last bit of Christmas decorations that come down. 


For the past few years, I've been saving the cards rather than throwing them out. I'd bundle them up with a rubber band, slap on a post-it denoting the year, and tuck them into a small storage tote.  But those days are over. 


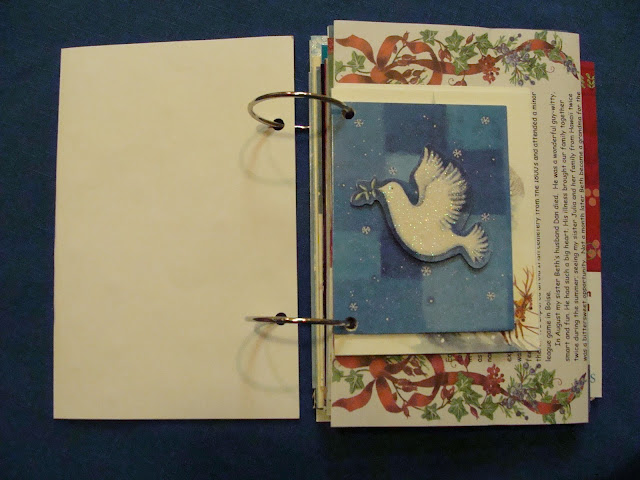
I found a better way to store them on Pinterest:  punch holes in the cards and secure them with clasping rings to make a fun Christmas card book.  This idea is from Michelle Allen at Close to My Art, and it's a brilliant one! 


I took it a step further and made a front cover for my Christmas card book.  The snowflakes were made using a Martha Stewart Crafts punch, and the year is stamped on.  So crafty!


The clasping rings I got for this project are too big, but I'll swap them out for some smaller ones before I tackle this year's cards.


Using two hole punches was sufficient for the cards.  Now I have all the cards, pictures and even Christmas letters secure for next year. 


To include the Christmas letters, I folded them in half with the writing on the outside. This way I can turn the page and not have to undo the clasping rings to read the whole letter.


I am really happy with how this project turned out. It was really easy to do, and the clasping rings only cost about $0.50 each at my local Ace Hardware.  This is going to make a great coffee table book for next year!

Monday, December 26, 2011

Manda Monday--Merry? Very!

The television-turned-puppet-theater is a hit!  Little Guy performs productions using many of the 28 puppets the kids received yesterday, while Little Miss has commandeered it as her very own playhouse.  Project Sony was a total and complete success!


We had a great Christmas, and I hope you did, too!  

Friday, December 23, 2011

Puppet Masterpiece Theater

A year ago, Handy Freddy and Big Guy brought home a huge TV left on the street by a neighbor.  It didn't work very well, so it sat in our basement for quite some time.  My idea was to have Handy Freddy gut it and turn it into a puppet theater for the kids.

Fast forward to November: Little Guy was sick and laying on the couch and said to me, "Mom, do you know what would be cool? A television that I could climb inside and do puppet shows."

Jaw. Hit. The. Floor. "Wow, what a great idea! That would be really cool!"

Little Guy has actually been inside a huge television doing a puppet show before.  It was last November, when the Jim Henson exhibit came to the Museum of Science and Industry in Chicago.  The exhibit included a huge television that could fit a dozen or so kids, plenty of puppets, backgrounds and costumes, and small television monitors inside the larger stage television so the kids could see their production as the audience saw it.  It was an awesome exhibit and a fun experience. Little Guy talked about it for days.


Now, in all fairness, I might have mentioned the possibility of turning the broken television into a puppet theater once to the Little Guy over the summer.  I truly don't remember.  It could be that he remembered the Jim Henson exhibit and wanted to recreate the experience--after all, Little Guy is very into puppets and play acting.  I do know that I decided that this should be the big Santa gift sometime in the fall, and it certainly wasn't discussed with the kids past that. 

So whether Little Guy came up with the idea on his own, or remembered that I said something about it months ago, this gift is obviously going to be a hit.  He even asked the Blackberry Farm Santa for a "television he could climb inside and do a puppet show in."  Score!


Handy Freddy gutted the television last month, and I spray painted the inside over the past few weeks. It took several coats of white primer and a few coats of color to get it smooth and even.  MOM2 made cushions and curtains for the theater in coordinating fabrics.


The above picture shows the fabric, but the curtains aren't in yet. They'll be held up by a tension rod just inside the frame of the television. Everything will be fully assembled tonight. 

Little Guy has also been asking for elf and reindeer puppets.  Done and done!


The elf puppets are from the Fiesta Toy Company.  I looked all over for handmade elf puppets, but had no luck.  Luckily, I found some adorable reindeer puppets on Etsy.  These are from Val's Various Creations, and she did an amazing job with them.  Lovely Val even sent a nice note with the puppets, saying she hoped my kids enjoy them.  I am sure they will, Val!


Needless to say, I am so excited for this Christmas, maybe even more so than my kids!  Little Guy is going to get exactly what he asked for from Santa, and I am so happy that I can give it to him.  I realized this does leave Little Miss out a bit, though she loves playing with puppets just as much as Little Guy does.  Little Miss is still too young to understand everything, and since she is still mostly babbling she hasn't made any specific Christmas requests.  I hope that they both love this puppet theater, and maybe next year when Little Miss is speaking clearly I can make a wish come true for her as well.

And I owe a huge thanks to Handy Freddy and MOM2 for helping me make this very special request become a reality. Thank you! 

Merry Christmas, Happy Hanukkah, Joyful Kwanzaa, Happy Holidays to all.  Whatever you celebrate, I hope all of your dreams and wishes come true.  Have a wonderful holiday!

Thursday, December 22, 2011

Christmas wishes

We've seen Santa Claus twice this season. The first time was at Blackberry Farm's Polar Express event. 


We immediately stood in line to see Santa, only to have Little Guy chicken out when it was almost our turn.  We rode the train a dozen times, saw Santa's sleigh, attended a reading of The Polar Express and finally worked up the nerve to see the Jolly Old Elf.


Little Guy delivered his Christmas letter (that's what Mrs. Claus is reading) and told Santa he wanted a television set he could climb inside and do puppet shows.  Santa said that was a very unusual request and that he'd have to get some special elves to work on it. 


We saw another Santa at Phillips Park Zoo.  There, the Little Guy asked Santa for elf and reindeer puppets.  Just an FYI: Little Miss is not yet talking coherently (at least, we are the only ones who can understand her language), so while she babbled away to Santa, we really have no idea what she asked for.  Let's hope it wasn't a pony, because that's not going to happen.


But what is going to happen is the television-turned-puppet-theater with the elf and reindeer puppets.  I'll give you the details tomorrow!

Wednesday, December 21, 2011

Last minute gift ideas

Christmas is only three days away...are you ready?  I have only one more gift to purchase, and I know exactly what it is so I'm not freaking out.  I do, however, know several people who are freaking out.  If that's the boat you're in, have no fear. Here are some super-duper last-minute Christmas ideas that are easy to buy and won't break the bank:

For her: gift certificates for manicures/pedicures.  You can't go wrong with this!

For him: new gloves, hat, scarf and a super-fancy heated windshield scraper. Cozy, yet technologically advanced. Win!

For kids: board and card games.  In a world where too many kids are plugged in too early and for too long, an old-fashioned board or card game is a nice break. How about a poker set?

For the couple:  chocolates and champagne.  No need to say more.

For the family: a family-friendly movie, popcorn, candy and a six-pack of high-end root beer.  Instant family movie night!

Need to buy a bunch of gifts?  My advice is to pick a theme and shop at a quality department-type store.

For example, let's say you are exhausted with all of this Christmas preparation and craziness. All you want to do is sleep, am I right?  THERE'S YOUR THEME!  There are lots of great gifts out there (for kids and adults) that relate to "sleep":

Pajamas (these are especially fun for kids)
Fancy sheets
New pillows
Fun and functional alarm clocks
Nightlights (again, especially fun for kids)
Cozy bathrobes
Throw blankets
Stuffed animals (for kids)
Night time reading materials (for kids or adults)
Slippers

Any of these items can be easily found at any major store, and at affordable prices. 

Here's another theme (and one of my favorites)....the kitchen!
What kitchen gifts would be suitable for a wide variety of people?

Cookbooks (good for kids and adults)
Popcorn maker (include popcorn and seasonings)
Blender (include drink mix)
Aprons
Food gift basket
Food kit--think cake pops, cupcakes, cookies, etc.
Platters and serving dishes
Vases and centerpieces
Tablecloths and placemats
High-end kitchen gadgets, such as a rotary cheese grater, omelet pan, food processor, etc.

Again, these are all items that can be purchased on a budget in any department-type store. 

Get an idea, make a list, check your budget and then get to the nearest store that suits your needs. Grab everything, check your list, make your purchases and go home to wrap.  At this point in the game, there's no reason to spend any time stressing out over what to get for whom...Christmas is right around the corner, and there are better things you could be doing with your time.  Such as sipping a nice Riesling while watching Miracle on 34th Street for the millionth time. 

And if all these ideas aren't working for you, head to Walgreen's or CVS and get everyone on your list a Chia pet.  Everyone loves those things!

Tuesday, December 20, 2011

My kitchen elves

Yesterday, I shared with you some great chocolate-peppermint Whoopie pies. What I didn't show you is the little elves who helped me make them.


My regular readers know that Little Guy and Little Miss are my constant companions in the kitchen.  When I begin a recipe, one of them (usually Little Guy) will drag the step stool from the pantry to the island, and they'll both climb up and beg to help. 


Little Guy has been successfully wielding a hand mixer since he was two, and now it's Little Miss's turn. She's not quite there yet, but then again, she's not quite two years old. 


Baking with kids is hard under normal circumstances, and even harder when a time constraint is involved. Still, I try to let my kids do as much as my patience will allow, knowing that I want them to have fun in the kitchen and enjoy the processes of cooking and baking.  But it's more than just having fun and making memories:  I want them to see up close what it means to read a recipe, follow directions, measure, pour, mix, stir and improvise when necessary.  These are all important life skills that while learned in the kitchen, are applicable everywhere.  Further, I want them to be able to take pride in the result and understand that only when you put in the work can you reap the reward. 

And they sure do like the reward!


I wonder if my little kitchen elves know all that.  Maybe they're too busy enjoying the reward. 
Then again, so am I.  I just love my kitchen elves.

Monday, December 19, 2011

Martha Monday--Whoopie!

Whoopie! Christmas is almost here, making it the perfect time for Christmas Whoopie pies. Yum!


I followed Martha's directions for chocolate Whoopie pies. For the filling, I whipped up a quick buttercream (one stick butter, 3 cups powdered sugar, 2 tablespoons milk...more or less) and added 2 teaspoons of peppermint extract and pink food color.


To up the peppermint flavor, I rolled the sides in crushed candy canes.


Martha's recipe claims to make 24 sandwiches, but I easily got 27...and as you can see, these were huge Whoopie pies!  The next time I make this recipe, I'll halve the ingredients and make smaller cookies for the sandwiches to make the Whoopie pies more bite-size.


These chocolate-peppermint Whoopie pies are a great offering for a Christmas party.  If you have the time (because we all have oodles of spare time just before Christmas, right?) and need a show-stopper dessert for a party, give these Whoopie pies a try!

Friday, December 16, 2011

Framed corkboards

This is a story about a project I dreamed up years ago and took forever to get done.  In March of 2010, I told BFF Laura about my great idea to frame cork boards and hang them in the toy room as a way to display kids' artwork.  Essentially, I wanted to create a kid-friendly art gallery.  With gold frames, I was sure the drawings and pictures would be elevated to high art. 


Months later, Laura gave me some large pieces of cork board, and fancy picture frames that she had spray-painted gold.  The frames and cork board sat, and sat, and sat.

Over this summer, I bought several cork boards from yard sales and thrift stores, as well as several fancy frames.  They went into the stack of cork board and frames from Laura.  And they sat, and sat, and sat.

Finally, faced with a ridiculous pile of cork board and frames and no spare time or know-how to combine, I asked myself "What would Martha do?"

Obviously, Martha would give this project to a member of her staff to complete.  I don't have a staff, but I do have Handy Freddy.  I gave this entire project to my brother, and things really started to move.


Here's how to make your own framed cork boards:

1. Buy fancy picture frames and large sheets of cork board at yard sales, thrift stores, etc.
2. Pop the frames off the cork board with a screwdriver.


3. Measure the cork board to fit a fancy picture frame. 


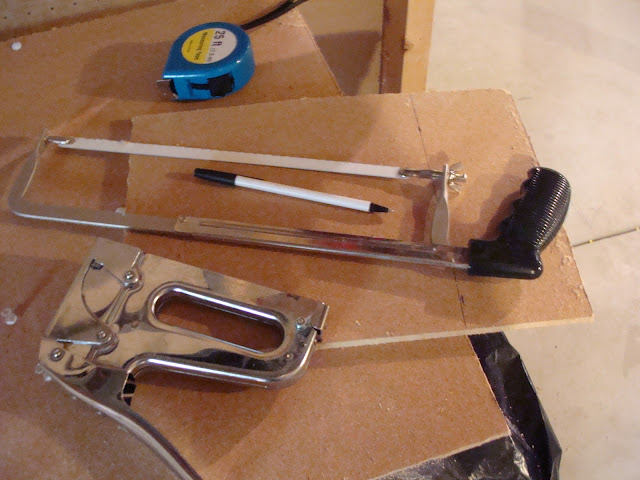
4. Carefully cut the cork board with a hacksaw.  Go slow during the cutting or the cork board will tear.


5. If you want to paint your fancy frames, now is the time to do it. I simply used gold spray paint on mine.


6. Fit the cork board into the empty fancy frame, and staple it in.


Ta-da! A beautifully framed piece of cork board that is ready to display just about anything.


Handy Freddy made seven framed cork boards for me and no two are framed alike or the same size. After all of his hard work, it was the least I could do to get someone else to hang the framed cork boards--I made the Big Guy do that. 


My original plan was to put the art gallery in the toy room, but instead I settled on a large blank wall in the foyer.  I immediately put several drawings/colorings from the kids in the frames, but lately they are quickly filling with Christmas cards and pictures.  Everything is secured with thumbtacks.


This project turned out even better than I had imagined--I am thrilled with how it looks!  For my part, I'm putting the cost at under $25 for all materials, though I'm sure Laura spent some money on the cork boards and frames. 

I owe a huge thanks to Laura for getting this project started, and to Handy Freddy for getting it done!  And another huge thanks to Freddy for taking the step-by-step pictures. 

By coming up with an idea and having my 'staff' do 95% of the work, I really am becoming more and more like Martha Stewart!  ;)  Kidding!  You know I love Martha more than my luggage.